前言 好玩的,本来想用v8搞的,结果发现v10都用了,貌似精度也更好,那就换个环境再继续。
环境搭建 先用Pycharm创建一个新环境,然后从Github上下载yolov10源码:
1 git clone https://github.com/THU-MIG/yolov10.git
将源码拉取到本地后,需要根据官方指南安装项目所需的依赖:
1
2
pip install -r requirements.txt
遇到版本不可寻的问题:
1
2
Could not find a version that satisfies the requirement opencv-python==4.9.0.80ERROR: No matching distribution found for opencv-python==4.9.0.80
去仓库看了看,这个版本的opencv是存在的,再次尝试直接用pip安装opencv成功了,感觉是玄学的网络问题。
yolov10环境完成后,可以再装个pyautogui用于后续的键鼠操作:
貌似环境里已经有了,至此环境搭建完成。
训练模型 首先在官方Github 下载预训练模型:
1 pip install git+https://github.com/THU-MIG/yolov10.git
遇到网络问题:
1 unable to access 'https://github.com/THU-MIG/yolov10.git/' : Failed to connect to github.com port 443
搜索一下,找到解决方案为刷新DNS缓存,在cmd中输入命令:
预训练模型下载完成,根据官方示例 ,简单测试一下:
1 2 3 4 5 6 from ultralytics import YOLOv10'jameslahm/yolov10n' )"cat.jpg" , save=True )
得到检测结果,看起来不错:
然后进入准备的游戏游玩,同时录制完成每日委托的游玩视频,准备截图用于制作数据集,我这里录制了四天的份量,先做个简单的模型测试一下效果。
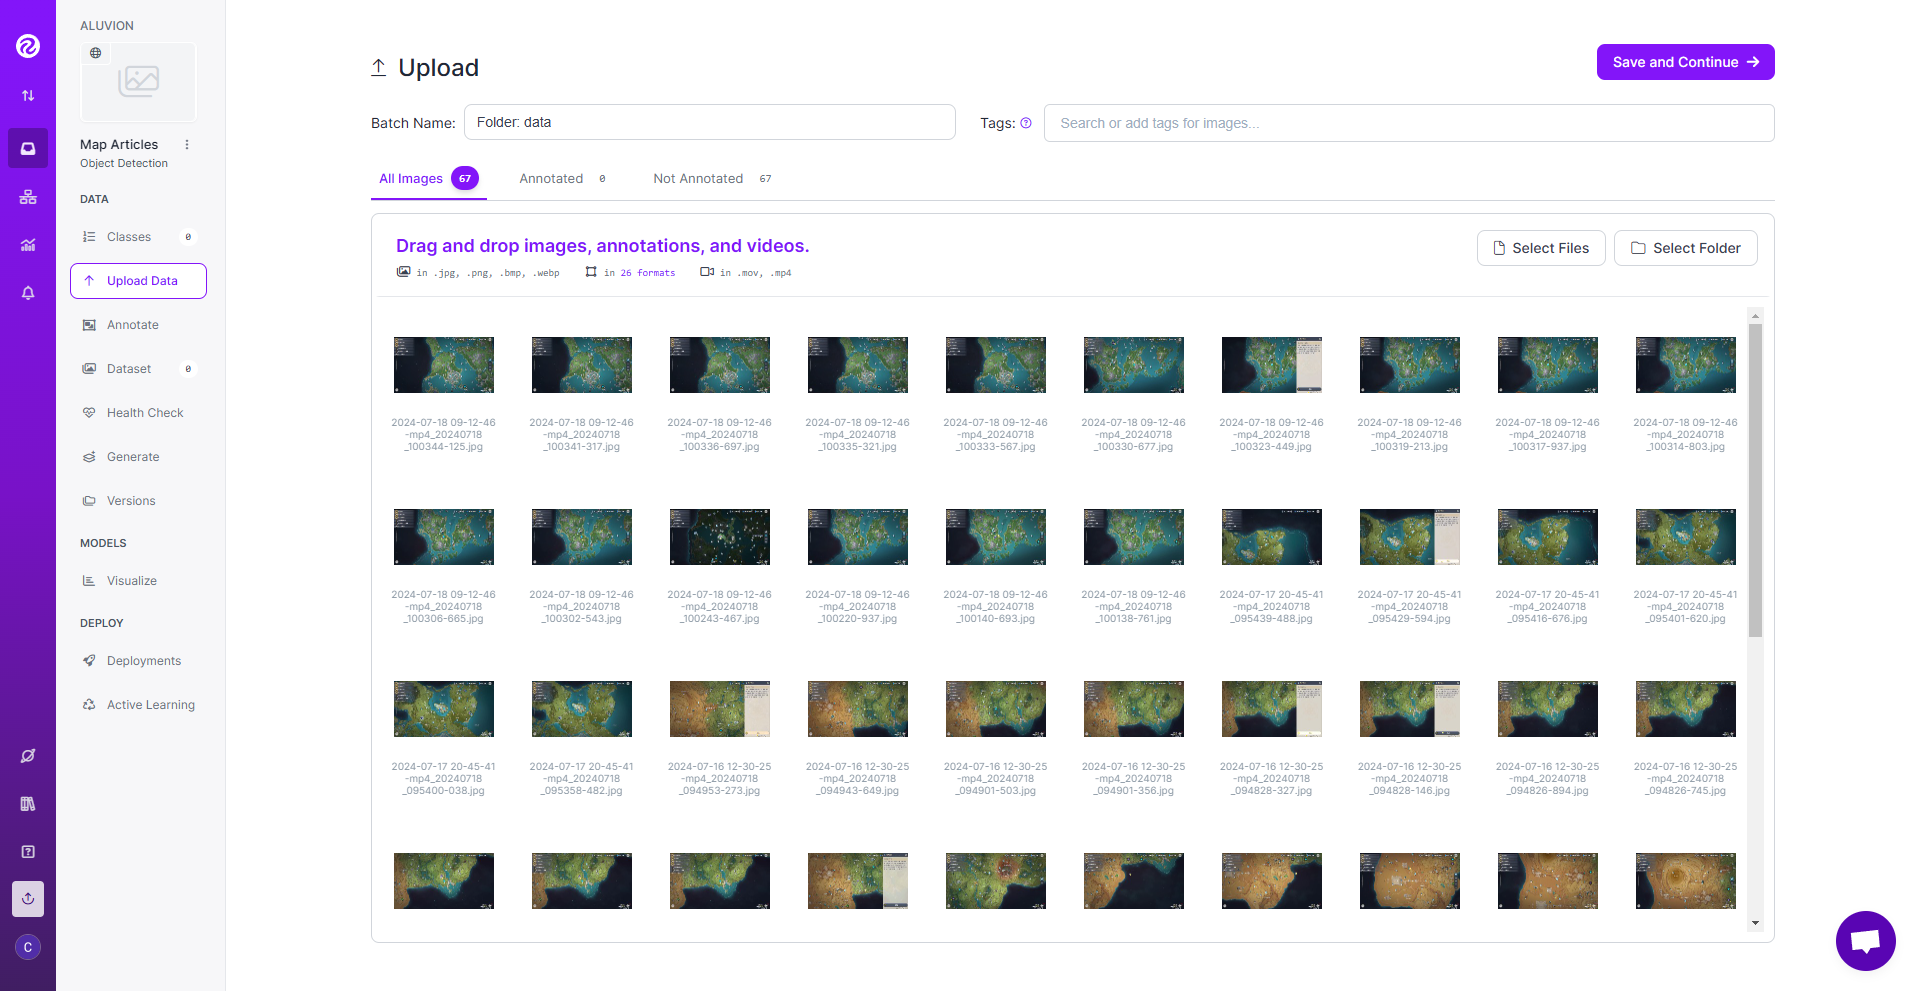
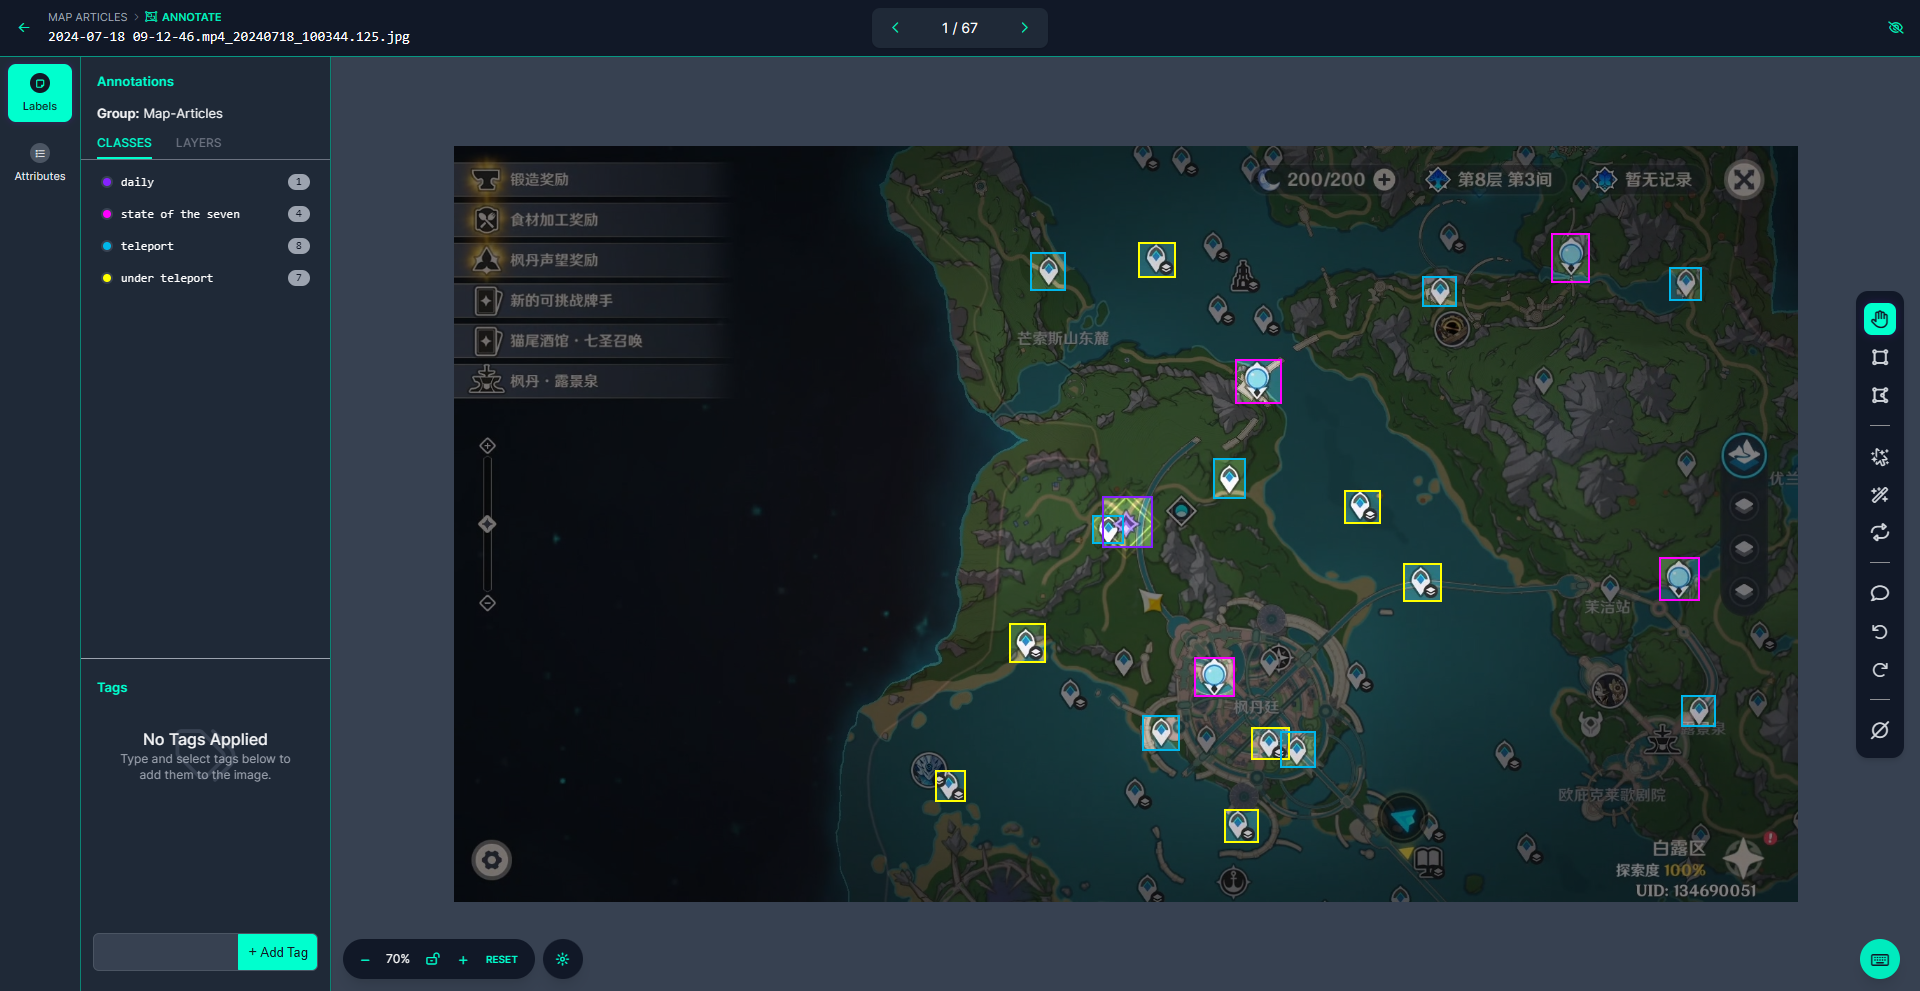
大地图 收集了67张图片,主要用于检测正在处理的委托和传送点,然后上传到标注网站roboflow 进行标注
一张张图片打开进行标注:
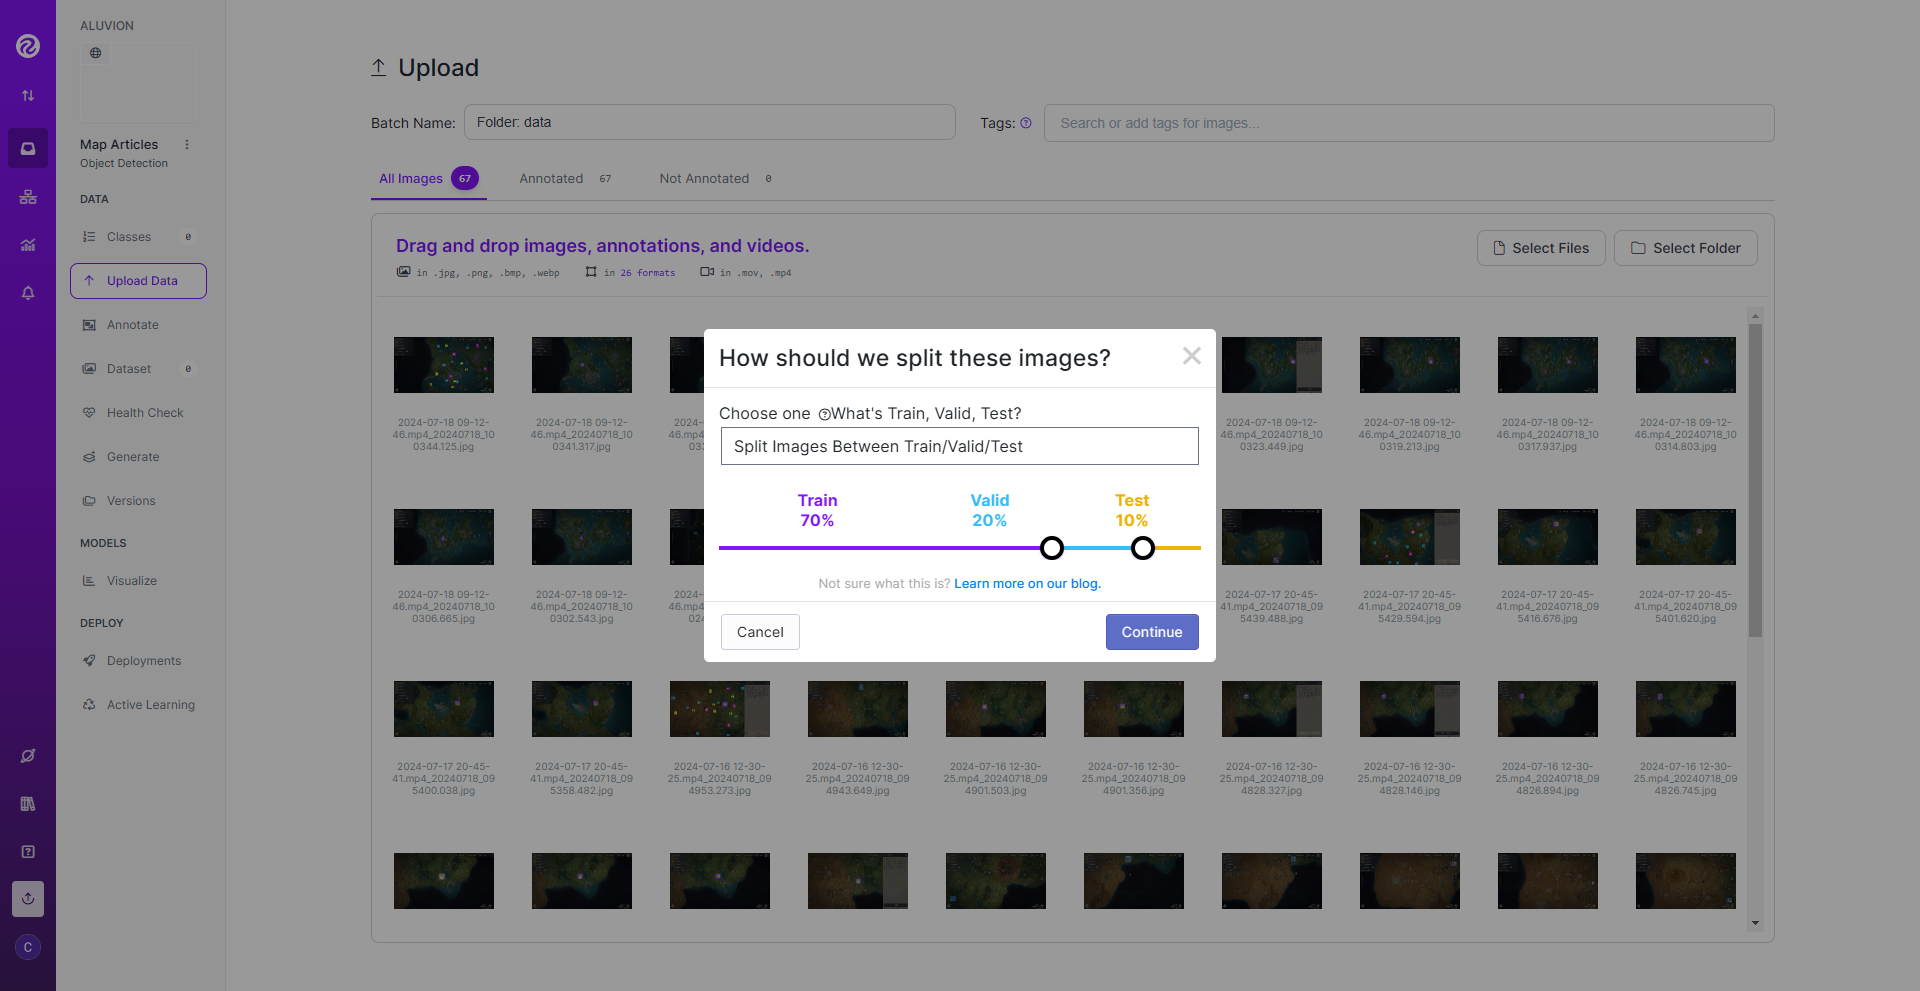
标注完成后,按照推荐比例生成训练集,验证集和测试集:
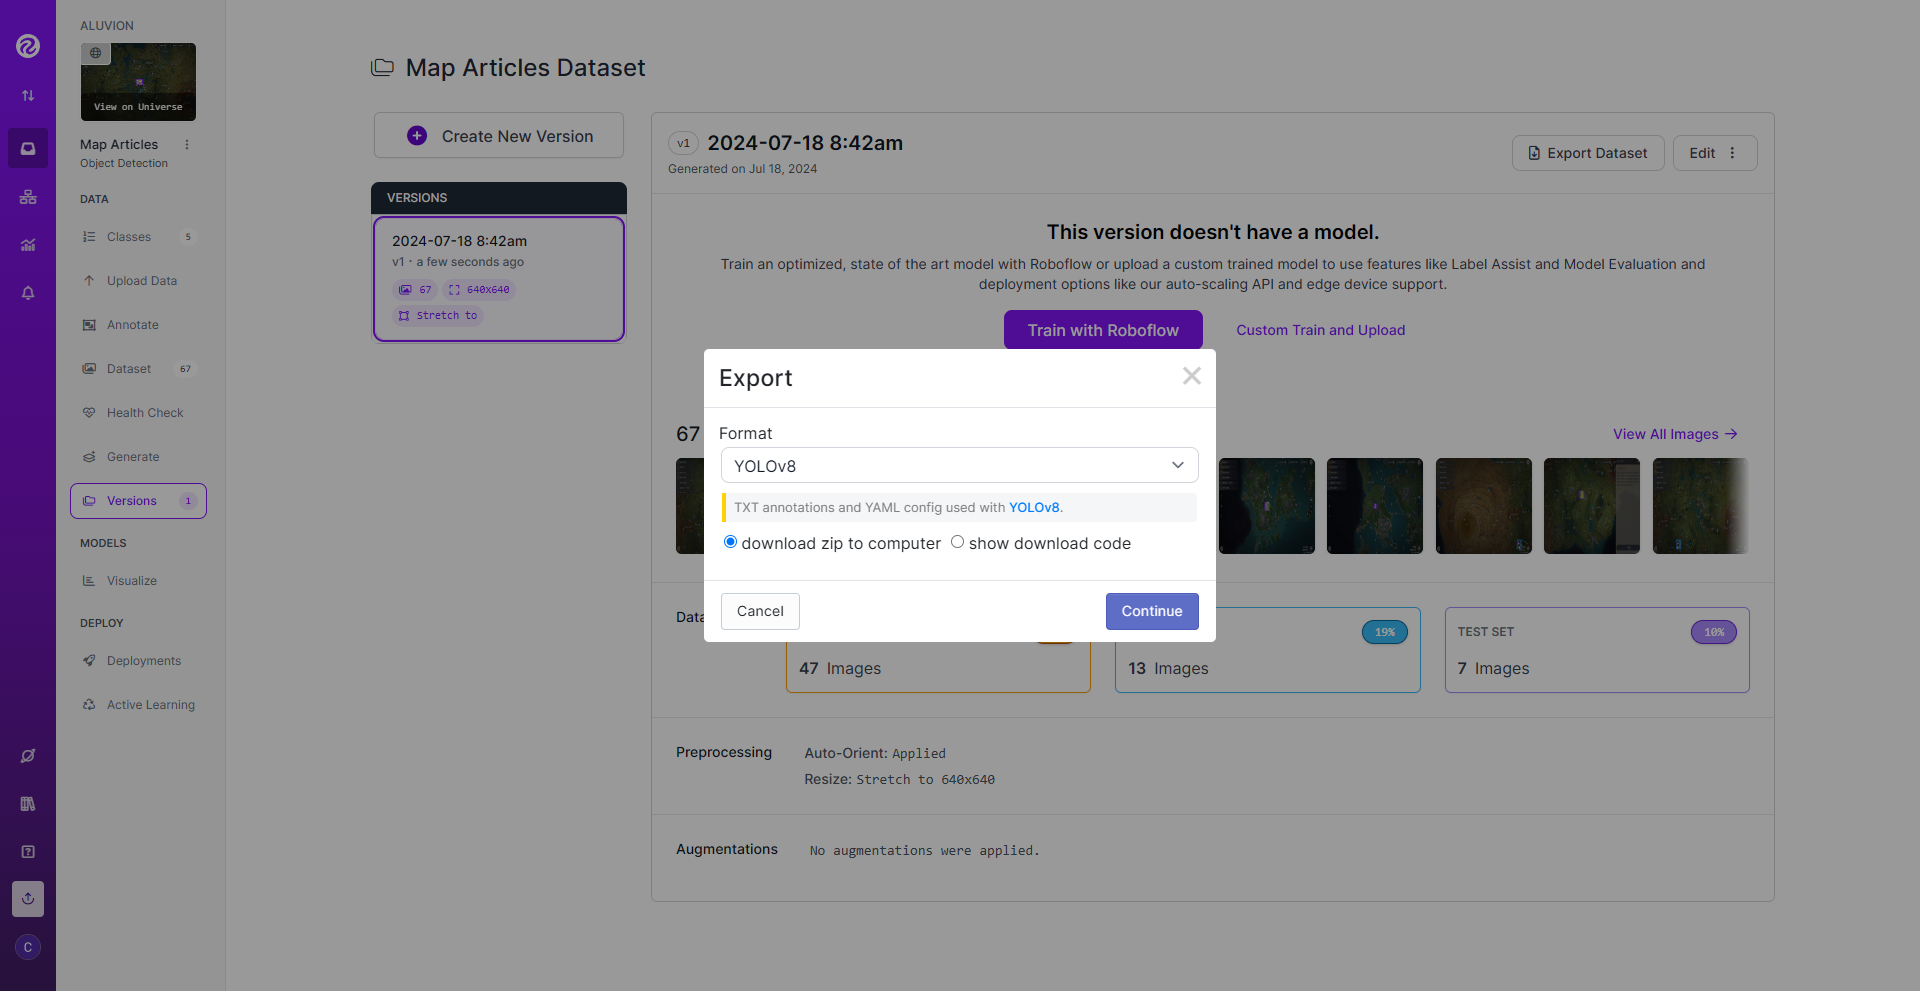
最后导出到本地:
开始训练:
1 2 3 4 5 6 from ultralytics import YOLOv10'jameslahm/yolov10n' )"../../../../datasets/data.yaml" , epochs=500 , imgsz=640 , device=0 , batch=16 )
但是在使用CUDA时发生问题:
1 ValueError: Invalid CUDA 'device=0' requested. Use 'device=cpu' or pass valid CUDA device(s) if available, i.e. 'device=0' or 'device=0,1,2,3' for Multi-GPU.
在网上搜索得到解决方法 ,应该是安装的torch为CPU版本导致的,需要卸载重装。
卸载:
1 pip uninstall torch torchvision torchaudio
找到对应版本重装:
1 pip install torch==2.3.0 torchvision==0.18.0 torchaudio==2.3.0 --index-url https://download.pytorch.org/whl/cu118
要下载挺久的,完成后重新开始训练,遇到新的问题:
1 CUDNN_BACKEND_EXECUTION_PLAN_DESCRIPTOR: cudnnFinalize Descriptor Failed cudnn_status
看起来可能是没有安装CUDNN导致的,尝试去官方网站 下载安装一下,根据参考文章 ,将文件解压到CUDA文件夹后,可以使用CUDA\v12.0\extras\demo_suite目录下的deviceQuery程序验证安装:
1
2
3
4
5
6
7
8
9
10
11
12
13
14
15
16
17
18
19
PS C:\Program Files\NVIDIA GPU Computing Toolkit\CUDA\v12.0\extras\demo_suite> .\deviceQuery.exe
据说获得两个Result = PASS就是CUDNN环境配置完成的标志。
再次开始训练,仔细看问题仍然存在异常类型为CUDNN_BACKEND_EXECUTION_PLAN_DESCRIPTOR:
1 CUDNN_BACKEND_EXECUTION_PLAN_DESCRIPTOR
那就不是CUDNN的问题,搜索找到参考文章 ,据说是Pytorch 2.3.0的问题,需要进行卸载重装降低版本,或者更新到2.3.1版本:
1 pip install --upgrade torch
发生警告:
1
2
torchvision 0 .18 .0 +cu118 requires torch==2 .3 .0 +cu118, but you have torch 2 .3 .1 which is incompatible.torchaudio 2 .3 .0 +cu118 requires torch==2 .3 .0 +cu118, but you have torch 2 .3 .1 which is incompatible.
看来要把这两个依赖也一起升级才行:
1 pip install --upgrade torchvision torchaudio
完成,将torchaudio更新到2.3.1版本,torchvision更新到0.18.1:
1 Successfully installed torchaudio-2 .3 .1 torchvision-0 .18 .1
再次开始训练,结果问题又回来了:
1 ValueError: Invalid CUDA 'device=0' requested. Use 'device=cpu' or pass valid CUDA device(s) if available, i.e. 'device=0' or 'device=0,1,2,3' for Multi-GPU.
问题在于更新后的torch又变回了CPU版本的:
1 Ultralytics YOLOv8.1 .34 🚀 Python-3 .9 .13 torch-2 .3 .1 +cpu
卸载后去掉前面的版本指定重新安装:
1 pip install torch==2.3.1 torchvision==0.18.1 torchaudio==2.3.1 --index-url https://download.pytorch.org/whl/cu118
再次遇到问题:
1
2
ERROR: THESE PACKAGES DO NOT MATCH THE HASHES FROM THE REQUIREMENTS FILE. If you have updated the package versions, please update the hashes. Otherwise, examine the package contents carefully; someone may
清除一下pip缓存再继续:
问题依然存在,但是他文件还没下载完就在校验哈希,怀疑网络之类的问题导致的,尝试使用浏览器下载,等完成后再自行校验哈希。
下载完成后校验哈希,计算出哈希与torch官网给出的哈希一致:
1
2
3
4
5
PS C:\Users\Twings\Downloads> Get-FileHash .\torch-2.3.1+cu118-cp39-cp39-win_amd64.whl -Algorithm sha256
使用pip安装whl,然后继续安装torchvision等剩余依赖,全部完成后再次开始训练,发现总是有问题:
1
2
3
RuntimeError: to start a new process before the process has finished its bootstrapping phase.
搜索一下,给train方法添加workers=0的参数可以解决,继续训练,训练终于正常可以进行了,训练完成:
1
2
3
4
5
6
7
8
9
10
11
12
Validating runs\detect\train15\weights\best.pt...Ultralytics YOLOv8.1 .34 🚀 Python-3 .9 .13 torch-2 .3 .1 +cu118 CUDA:0 (NVIDIA GeForce RTX 3060 Laptop GPU, 6144 MiB)YOLOv10n summary (fused): 285 layers, 2696366 parameters, 0 gradients, 8 .2 GFLOPsClass Images Instances Box(P R mAP50 mAP50-95 ): 100 %|██████████| 1 /1 [00:00<00:00, 5.34it/s] all 13 27 0 .842 0 .4 0 .333 0 .217 daily 13 9 0 .271 1 0 .616 0 .402 far daily 13 4 0 .941 1 0 .995 0 .653 state of the seven 13 4 1 0 0 .037 0 .02 teleport 13 7 1 0 0 .0102 0 .00509 under teleport 13 3 1 0 0 .00653 0 .00326 Speed : 0 .5 ms preprocess, 5 .2 ms inference, 0 .0 ms loss, 0 .0 ms postprocess per imageResults saved to runs\detect\train15
训练完成后,使用训练好的模型对验证集进行测试:
1
2
3
4
5
6
7
model_path = "runs/detect/train15/weights/best.pt" "datasets/valid/images" for img in os.listdir(validateImg_path):if img.endswith(".jpg" ):True )
效果:
感觉上训练效果很差,看来需要修改一下训练集数量和生成方法。
因为roboflow是个外网网站,使用起来没那么方便,所以这次使用的是本地标注工具labelimg,安装一下:
1 pip install labelimg -i https://pypi.tuna.tsinghua.edu.cn/simple
创建好数据集目录:
使用命令打开软件进行标注:
1 labelimg JPEGImages classes.txt
完成后,将数据集分割成训练集、验证集和测试集,配置好yaml文件,然后开始训练,遇到问题:
1 WARNING ⚠️ no labels found in detect set , can not compute metrics without labels
又回去看了看参考文章,应该是数据集格式的问题,现在的格式为voc格式的xml文件,需要转化为yolo格式的txt文件。
训练完之后测试了一下,感觉大部分检测效果还行,但是其中一类应该是由于样本量太少的原因检测不出来:
1
2
3
4
5
6
Class Images Instances Box(P R mAP50 mAP50-95 ): 100 %|██████████| 1 /1 [00:00<00:00, 5.74it/s] all 5 162 0 .782 0 .582 0 .645 0 .408 daily 5 12 1 0 0 .107 0 .0608 the_seven 5 15 0 .659 0 .933 0 .903 0 .645 teleport 5 102 0 .796 0 .833 0 .874 0 .503 under_teleport 5 33 0 .673 0 .561 0 .694 0 .422
贴一张预测结果图:
参考 官方手册
标注网站roboflow
深度学习(10)之Roboflow 使用详解:数据集标注、训练及下载
YOLOv10 正式发布!原理、部署、应用一站式齐全
目标检测:yolov8(ultralytics)训练自己的数据集,新手小白也能学会训练模型,一看就会